
My Account: Profile, Resumes, Credits & Security
Set up the profile, resume, and answers that power every HireMindPro feature.
My Account (at /myaccount) is your home base for everything HireMindPro reuses across the app. From here you edit your profile (name, contact info, work experience, education, skills), upload and pick the active resume that powers interview answer generation and auto-apply, top up or check your credit balance, and manage security (password and active sessions). Your separate Job Preferences and default answers — reused by auto-apply to fill out application forms — live under the Jobs page.
- Who it's for
- Every HireMindPro user, especially brand-new ones. Set this up first: the rest of the app (interview answers, resume tailoring, auto-apply) pulls from your profile, your active resume, and your saved Job Preferences.
- Cost
- Free. Editing your profile, uploading/activating resumes, and saving Job Preferences or default answers cost no credits and are available on any plan. Credits are only spent by downstream features (for example auto-apply, shown on the Credits tab under "What credits cost").
- Before you start
- A HireMindPro account and an active sign-in (you are redirected to /signin if logged out)
- A resume file (PDF, DOC, or DOCX) ready to upload for the Resumes tab
- Nothing else is required to edit your profile or save preferences — these are free on every plan
Open My Account
- Sign in, then go to /myaccount (the "Account" area). You'll see a welcome header "Welcome back, [your name]." and, if you're on a paid plan, a Membership card showing your tier and when it renews/expires.
- Use the tab bar to switch between Profile, Resumes, Credits, and Security.

Edit your profile (Profile tab)
- Click the Profile tab to open the "My Profile" form.
- Fill in First Name and Last Name (both required). Email is shown read-only and can't be changed here.
- Add Phone, LinkedIn URL (must start with http:// or https://), and your address: Street Address, City, State, ZIP Code, and Country.
- Write a Professional Summary and list your Technical Skills & Core Competencies (e.g. "Python, C++").
- Under Professional Experience, click "+ Add Experience" and fill Job Title (required), Employment Type, Company/Organization (required), Location, Location Type (On-site/Hybrid/Remote), Start/End dates, and a Description. Tick "Currently working here" to leave the end date open. Use "Remove" to delete an entry.
- Under Education, click "+ Add Education" and fill School (required), Degree, Field of Study, dates, GPA, and Activities & Societies.
- Click Save. A "Saved successfully" message confirms it; validation errors appear as a toast and scroll you to the field that needs fixing.
Upload and choose your active resume (Resumes tab)
- Click the Resumes tab.
- Click "Upload resume" and pick a PDF, DOC, or DOCX file. The new resume is uploaded, added to "Your resumes", and made active automatically.
- To switch which resume is active, click the radio button next to the one you want. Only one resume is active at a time.
- Use "Preview" (for PDFs) or "Download" (for DOCX) to open a file, and "Delete" to remove one (you'll be asked to confirm).
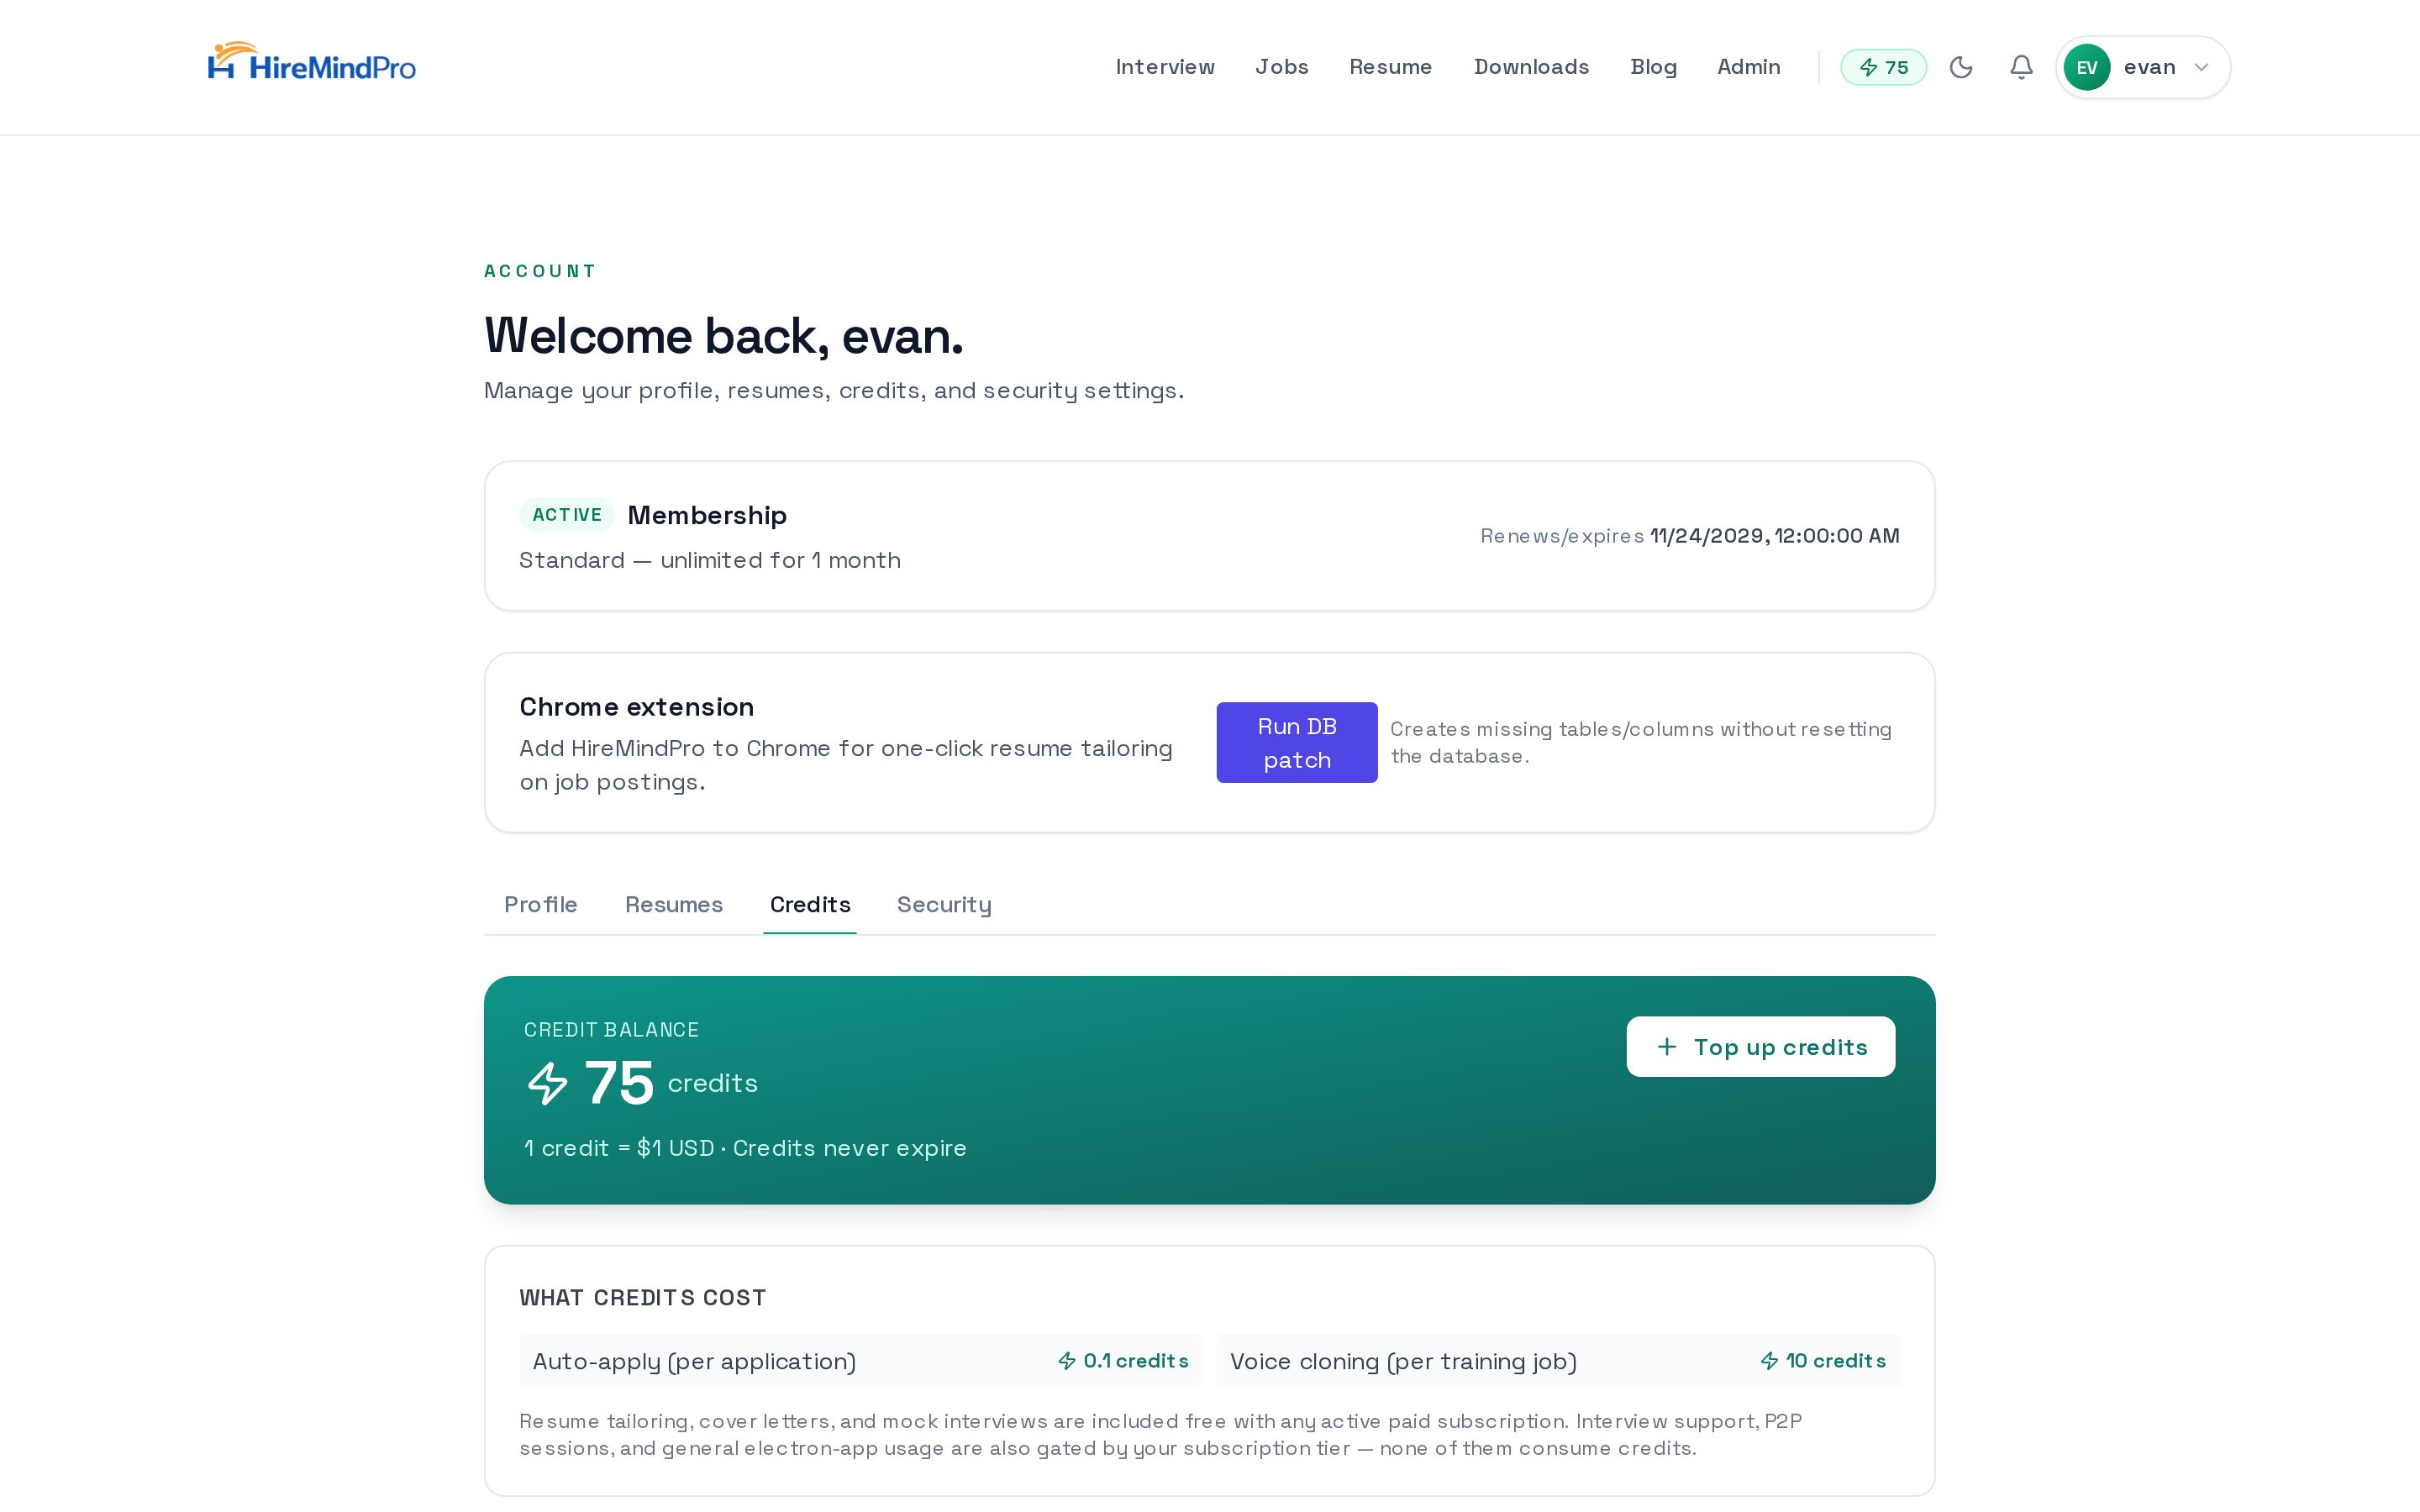
Check or top up credits (Credits tab)
- Click the Credits tab to see your Credit balance (1 credit = $1 USD; credits never expire).
- Review "What credits cost" to see per-action pricing, such as "Auto-apply (per application)".
- Click "Top up credits" to add more when you need them.
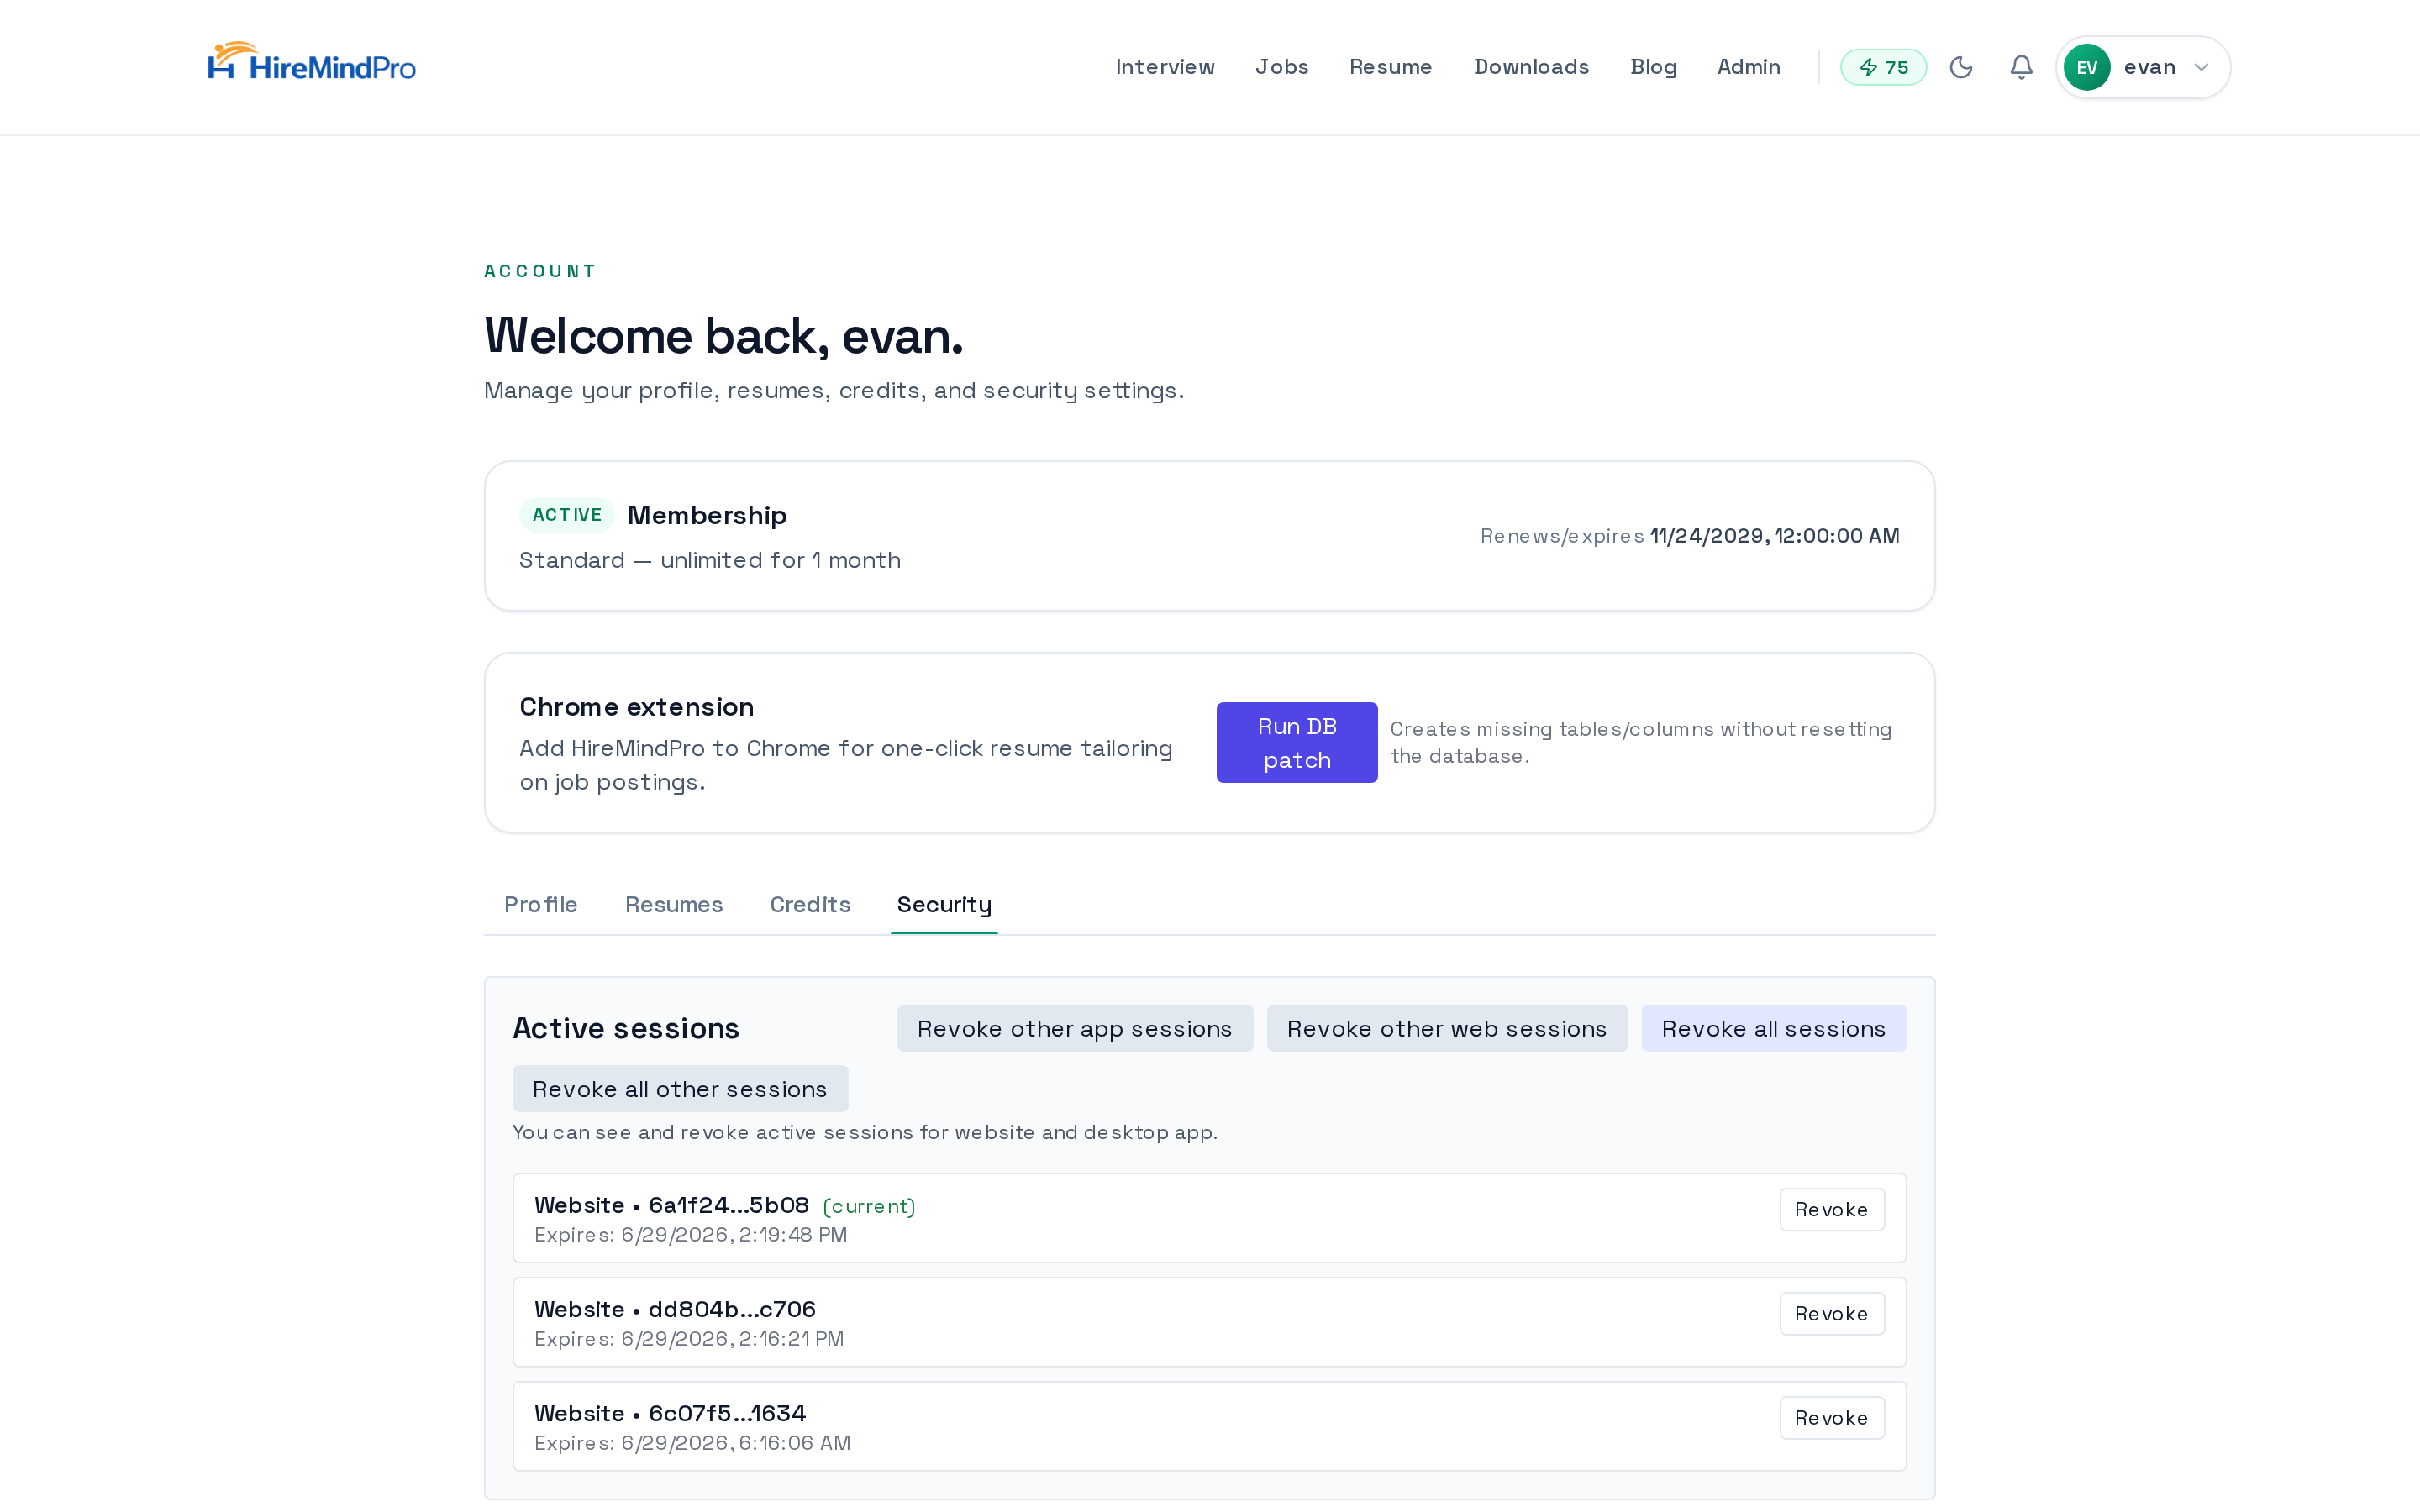
Manage security: password & sessions (Security tab)
- Click the Security tab.
- Under sessions, review your active sessions and click Revoke on any you don't recognize (you'll confirm before it's revoked). This is the place to clean up if you saw a "Multiple sessions detected" warning.
- To change your password, enter your Current password (if you already have one), then a New password and Confirm new password (minimum 8 characters), and click "Change password". If you signed up with Google and have no password yet, you'll instead "Set password" to enable email sign-in alongside Google.
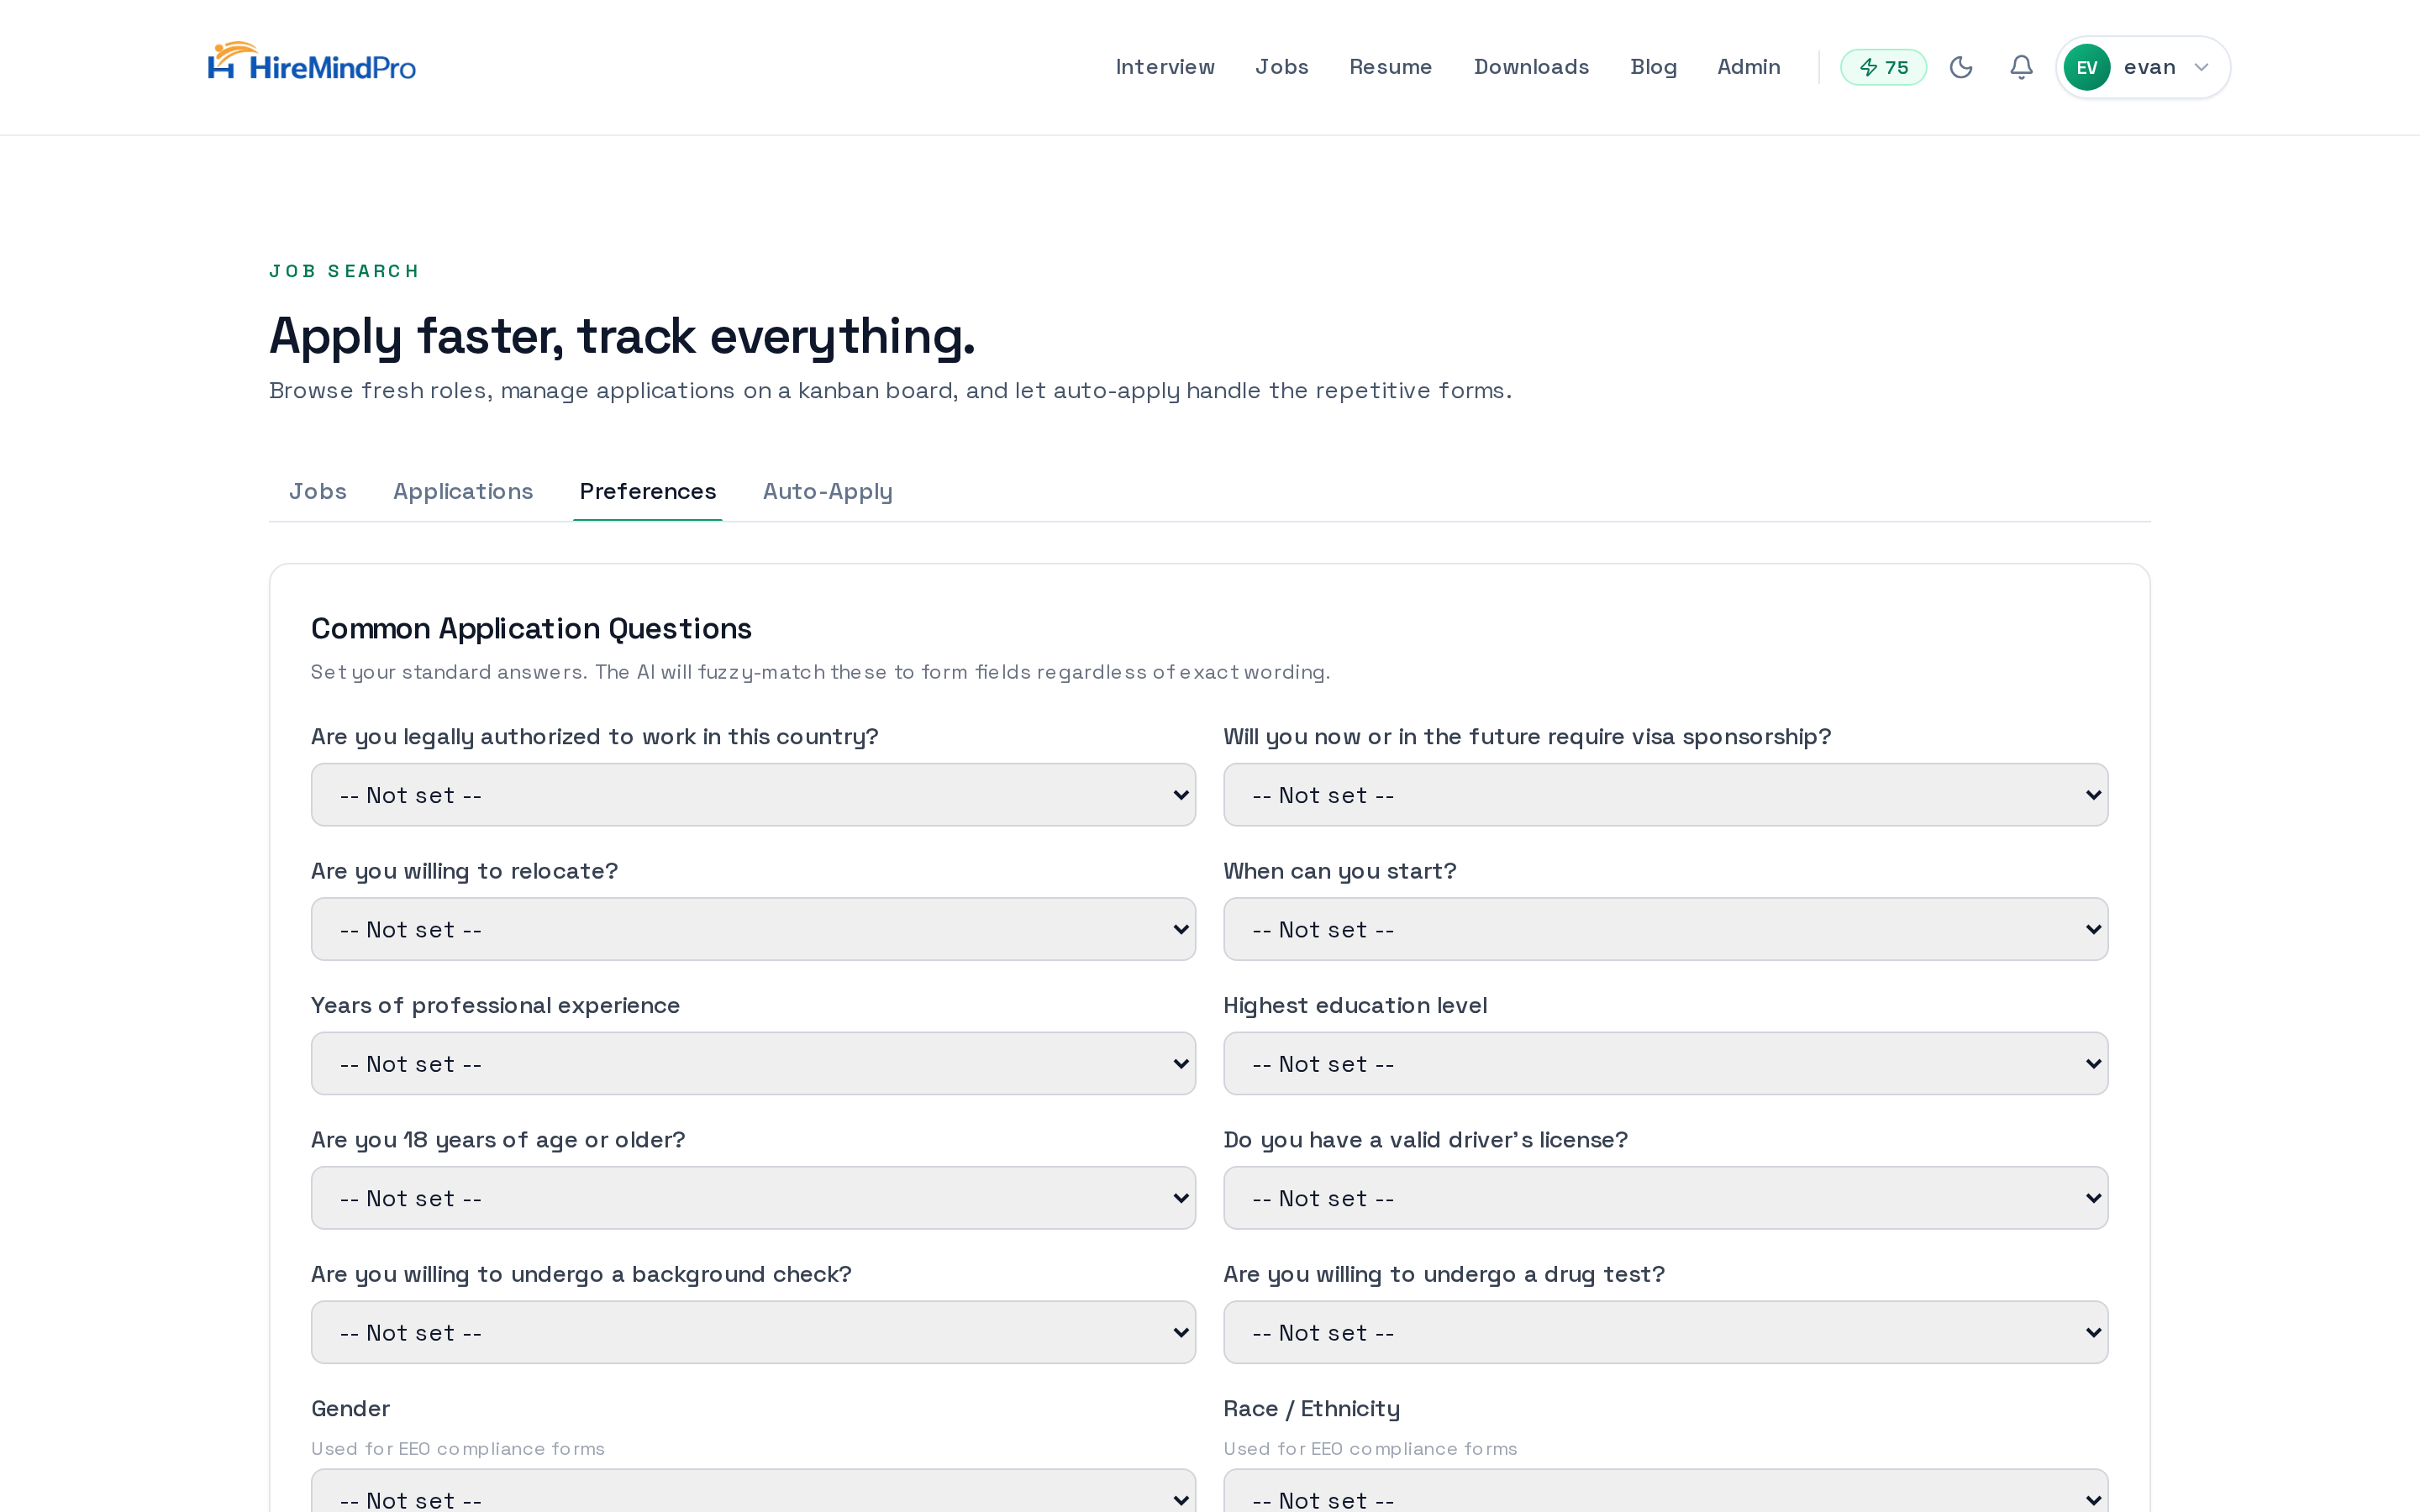
Set Job Preferences & default answers (used by auto-apply)
- Job Preferences are not on the Account page — go to the Jobs page and open the "Preferences" tab (/jobs?tab=preferences).
- Under "Common Application Questions", set standard answers (work authorization, visa sponsorship, relocation, start date, years of experience, education, EEO questions, pronouns, notice period, and more). The AI fuzzy-matches these to form fields regardless of exact wording.
- Under "About You", fill free-text fields ATS forms ask for: current job title, current company, GitHub URL, portfolio/website URL, a free-text salary expectation, and a default cover letter template (auto-apply tailors it per job).
- Under "Job Search Preferences", add Desired Roles, Preferred Locations, a Salary Range (min/max + currency + period), Job Types, and Industries.
- Under "Custom Default Answers", add your own Question/Answer rows for uncommon prompts; click "Add row" for more or "Remove" to delete one.
- Click "Save Preferences". A "Preferences saved" toast confirms it.
Tips & good to know
- Set up your profile and active resume first — interview answer generation, resume tailoring, and auto-apply all read from them.
- The active resume (not your typed profile) is your application identity for auto-apply, so make sure the right one is selected on the Resumes tab.
- Profile, resume, and preferences changes are saved per-section: click Save on the profile form, and Save Preferences on the Jobs Preferences tab — they're separate forms.
- Email is read-only on the profile form; you can't change your account email there.
- If you see the "Multiple sessions detected" banner, the page forces the Security tab so you can revoke the other sessions before continuing.
FAQ
Where do I set the answers auto-apply uses on application forms?
On the Jobs page under the Preferences tab (/jobs?tab=preferences), not on the Account page. Set Common Application Questions, the About You free-text fields, and any Custom Default Answers, then click Save Preferences.
What file types can I upload as a resume?
PDF, DOC, or DOCX. The newest upload becomes your active resume automatically; you can switch the active one anytime with the radio buttons on the Resumes tab.
Does editing my account or saving preferences cost credits?
No. Profile edits, resume uploads, and saving Job Preferences are free on any plan. Credits are only used by downstream actions like auto-apply, which you can see priced on the Credits tab.
Can I change my account email?
Not from the profile form — the Email field is read-only there.
Why is my account locked to the Security tab?
HireMindPro detected multiple active web sessions. It keeps them active for review and asks you to revoke the ones you don't recognize on the Security tab before returning to normal access.
Ready to try it yourself?
Open My Account →