
Jobs & Auto-Apply
Browse fresh roles, let AI submit tailored applications for you, and track every one on a kanban board.
The Jobs page is where you search a live feed of remote roles, filter them, and apply. For supported jobs, Auto-Apply does the work for you: it generates a tailored resume and short cover letter, then submits the application directly through the employer's ATS (Greenhouse, Lever, Ashby, Workable, SmartRecruiters), emails a proposal to the recruiter, or fills out the company's web form. Every application you start lands on an Applications kanban board so you can track its status from Pending through Applied, Interview, and Offer. You're charged 0.1 credits only when an application is actually submitted successfully.
- Who it's for
- Active job seekers who want to apply to many roles fast without re-filling the same forms, passive candidates who want to apply only to tightly-filtered matches, and anyone who wants one board to track every application. You need to be signed in with a resume on file; some application types also need a one-time email setup.
- Cost
- 0.1 credits per successful application. Nothing is charged if an attempt fails — credits are only deducted when the application is actually submitted (the job reaches COMPLETED). Manual applying (tracking only) is free. You need at least 0.1 credits to start, retry, or resume an auto-apply.
- Before you start
- A HireMindPro account (you'll be redirected to /signin if you're not logged in)
- A resume on file — upload one in My Account, or upload directly in the Apply dialog the first time
- At least 0.1 credits in your balance to start an auto-apply (you can also top up later)
- For Quick Apply (Greenhouse, Lever, Ashby, Workable, SmartRecruiters) jobs: nothing else — no email setup needed
- For Email Apply jobs: a sending email (SMTP) configured in Auto-Apply Settings
- For Verified/form-based jobs that require sign-up: your application email + IMAP settings in Auto-Apply Settings (optional, only for those jobs)
Open the Jobs page and find the tabs
- Go to /jobs (the page header reads "Apply faster, track everything."). If you're not signed in you'll be sent to the sign-in page and returned here afterward.
- You'll see four tabs along the top: Jobs, Applications, Preferences, and Auto-Apply.
- Jobs is where you search and apply. Applications is your kanban tracking board. Preferences holds your saved job preferences. Auto-Apply is the one-time email/IMAP setup.
Search and filter jobs
- On the Jobs tab, use the big search bar at the top. Type plain keywords (like "data engineer") for a classic search, or describe the role in a full sentence and AI search will find it.
- Type a location in the Location box, then click Search (or press Enter).
- Click the Sparkles button next to the search box to force AI search ON, OFF, or leave it on Auto (it auto-detects natural-language queries).
- Use the category chips (Software Development, Back-End, Front-End, Full Stack, Data Engineering, DevOps, Product, Design) for one-click searches.
- Use the left sidebar filters: Apply type (Quick Apply (ATS), Email Apply, Manual Apply), Language, Remote type, Region (US/EMEA/LATAM Remote), Salary min/max, Experience, and Contract type. On mobile, tap the Filters button to open the drawer.
- Change the result order with the Sort by dropdown: Date Posted, Relevance, or Salary. Use the pagination arrows at the bottom to move between pages.
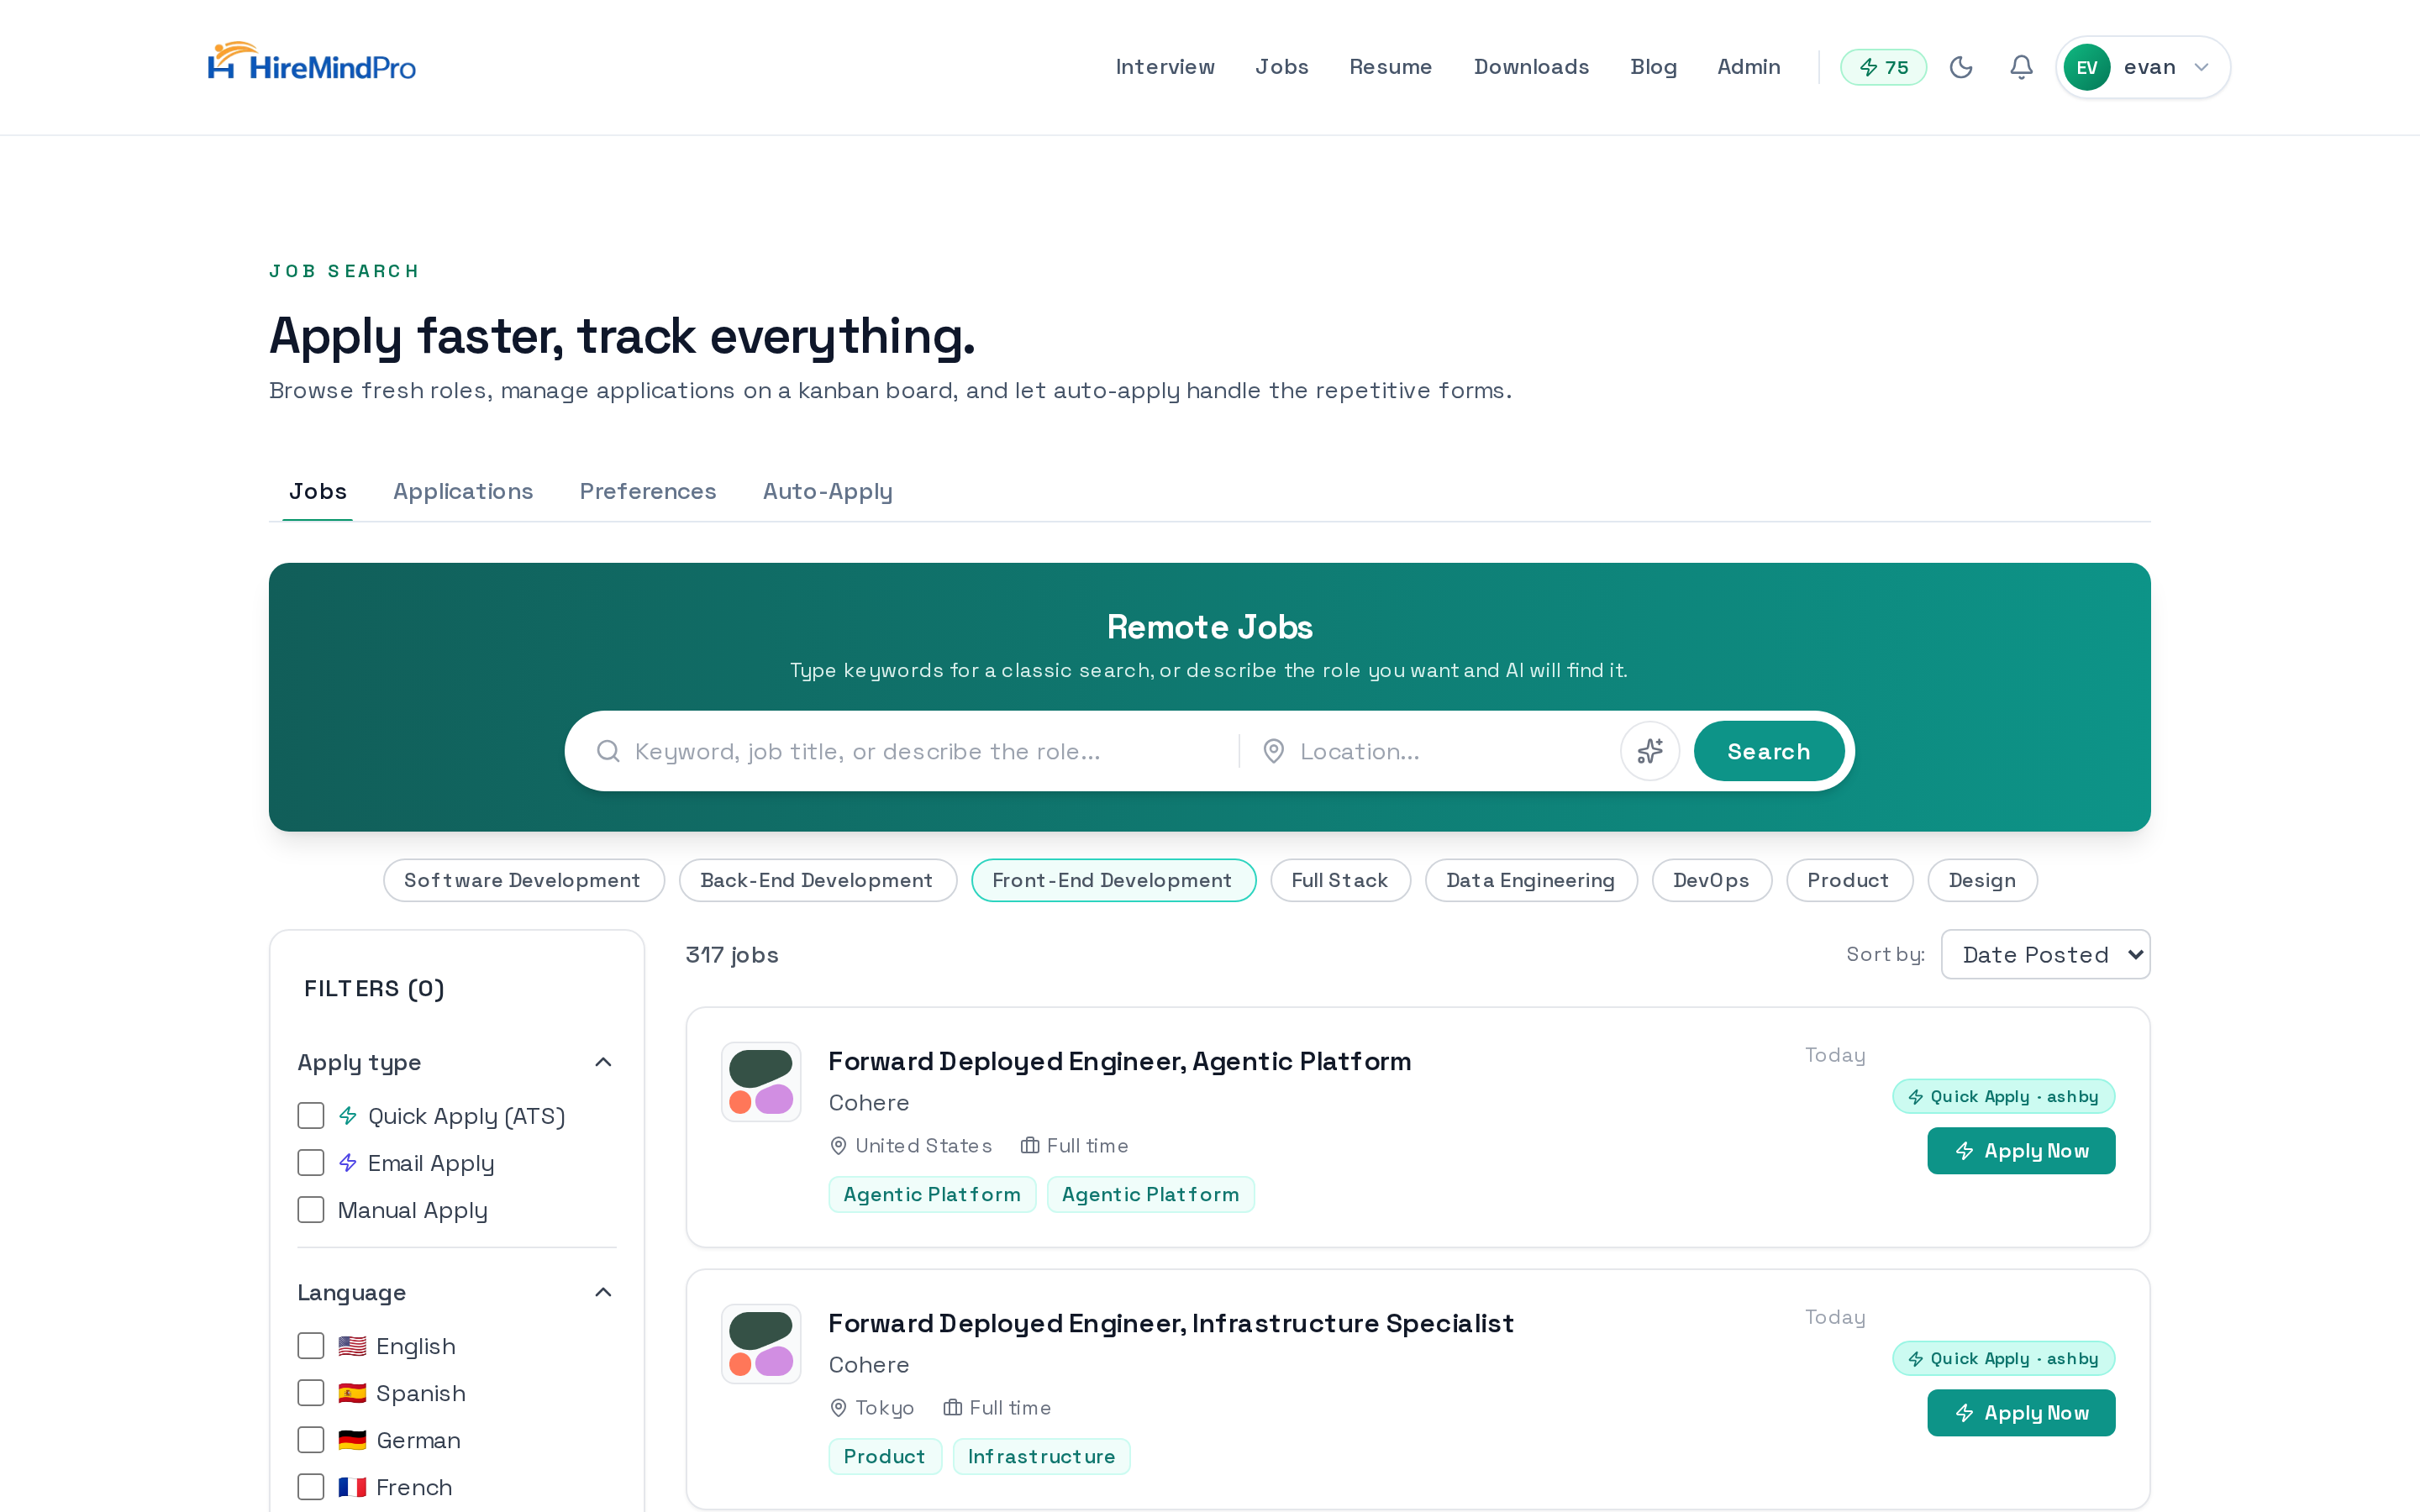
Understand the badges on each job
- A teal "Quick Apply" badge (sometimes with the platform name, e.g. "Quick Apply · greenhouse") means the job submits directly through the employer's ATS API — no email setup required.
- An indigo "Email Apply" badge means the application is sent as a proposal email to the recruiter's address.
- Jobs with no badge are Manual Apply — the Apply button opens the employer's site for you to fill out yourself.
- Jobs you've already applied to show a greyed-out "Applied" button.
Apply to a job
- Click Apply Now (auto-eligible jobs) or Apply Manually on a job card to open the Apply dialog.
- The dialog title reads "Choose how you want to apply" and shows the role and company. Auto-eligible jobs show two cards: an Auto-Apply / Quick Apply / Auto-Apply by Email card, and an Apply manually card.
- To auto-apply, click the button on the auto card ("Quick Apply", "Send Proposal Email", or "Use Auto-Apply"). If email setup is required for that job and you haven't done it, you'll see a "Setup Required" screen with a "Go to Auto-Apply Settings" button.
- On the "Select Resume" step, choose "Use current resume" or "Upload a new resume" (PDF, DOC, DOCX). We'll tailor it to the job description.
- Click "Quick Apply" / "Start Auto-Apply". You'll see a success message: "Auto-apply started! Track progress in the Applications tab."
- To apply manually instead, click "Apply manually" — the employer's page opens in a new tab. After you finish there, return and click "Yes, I applied" so it's tracked (this is free).
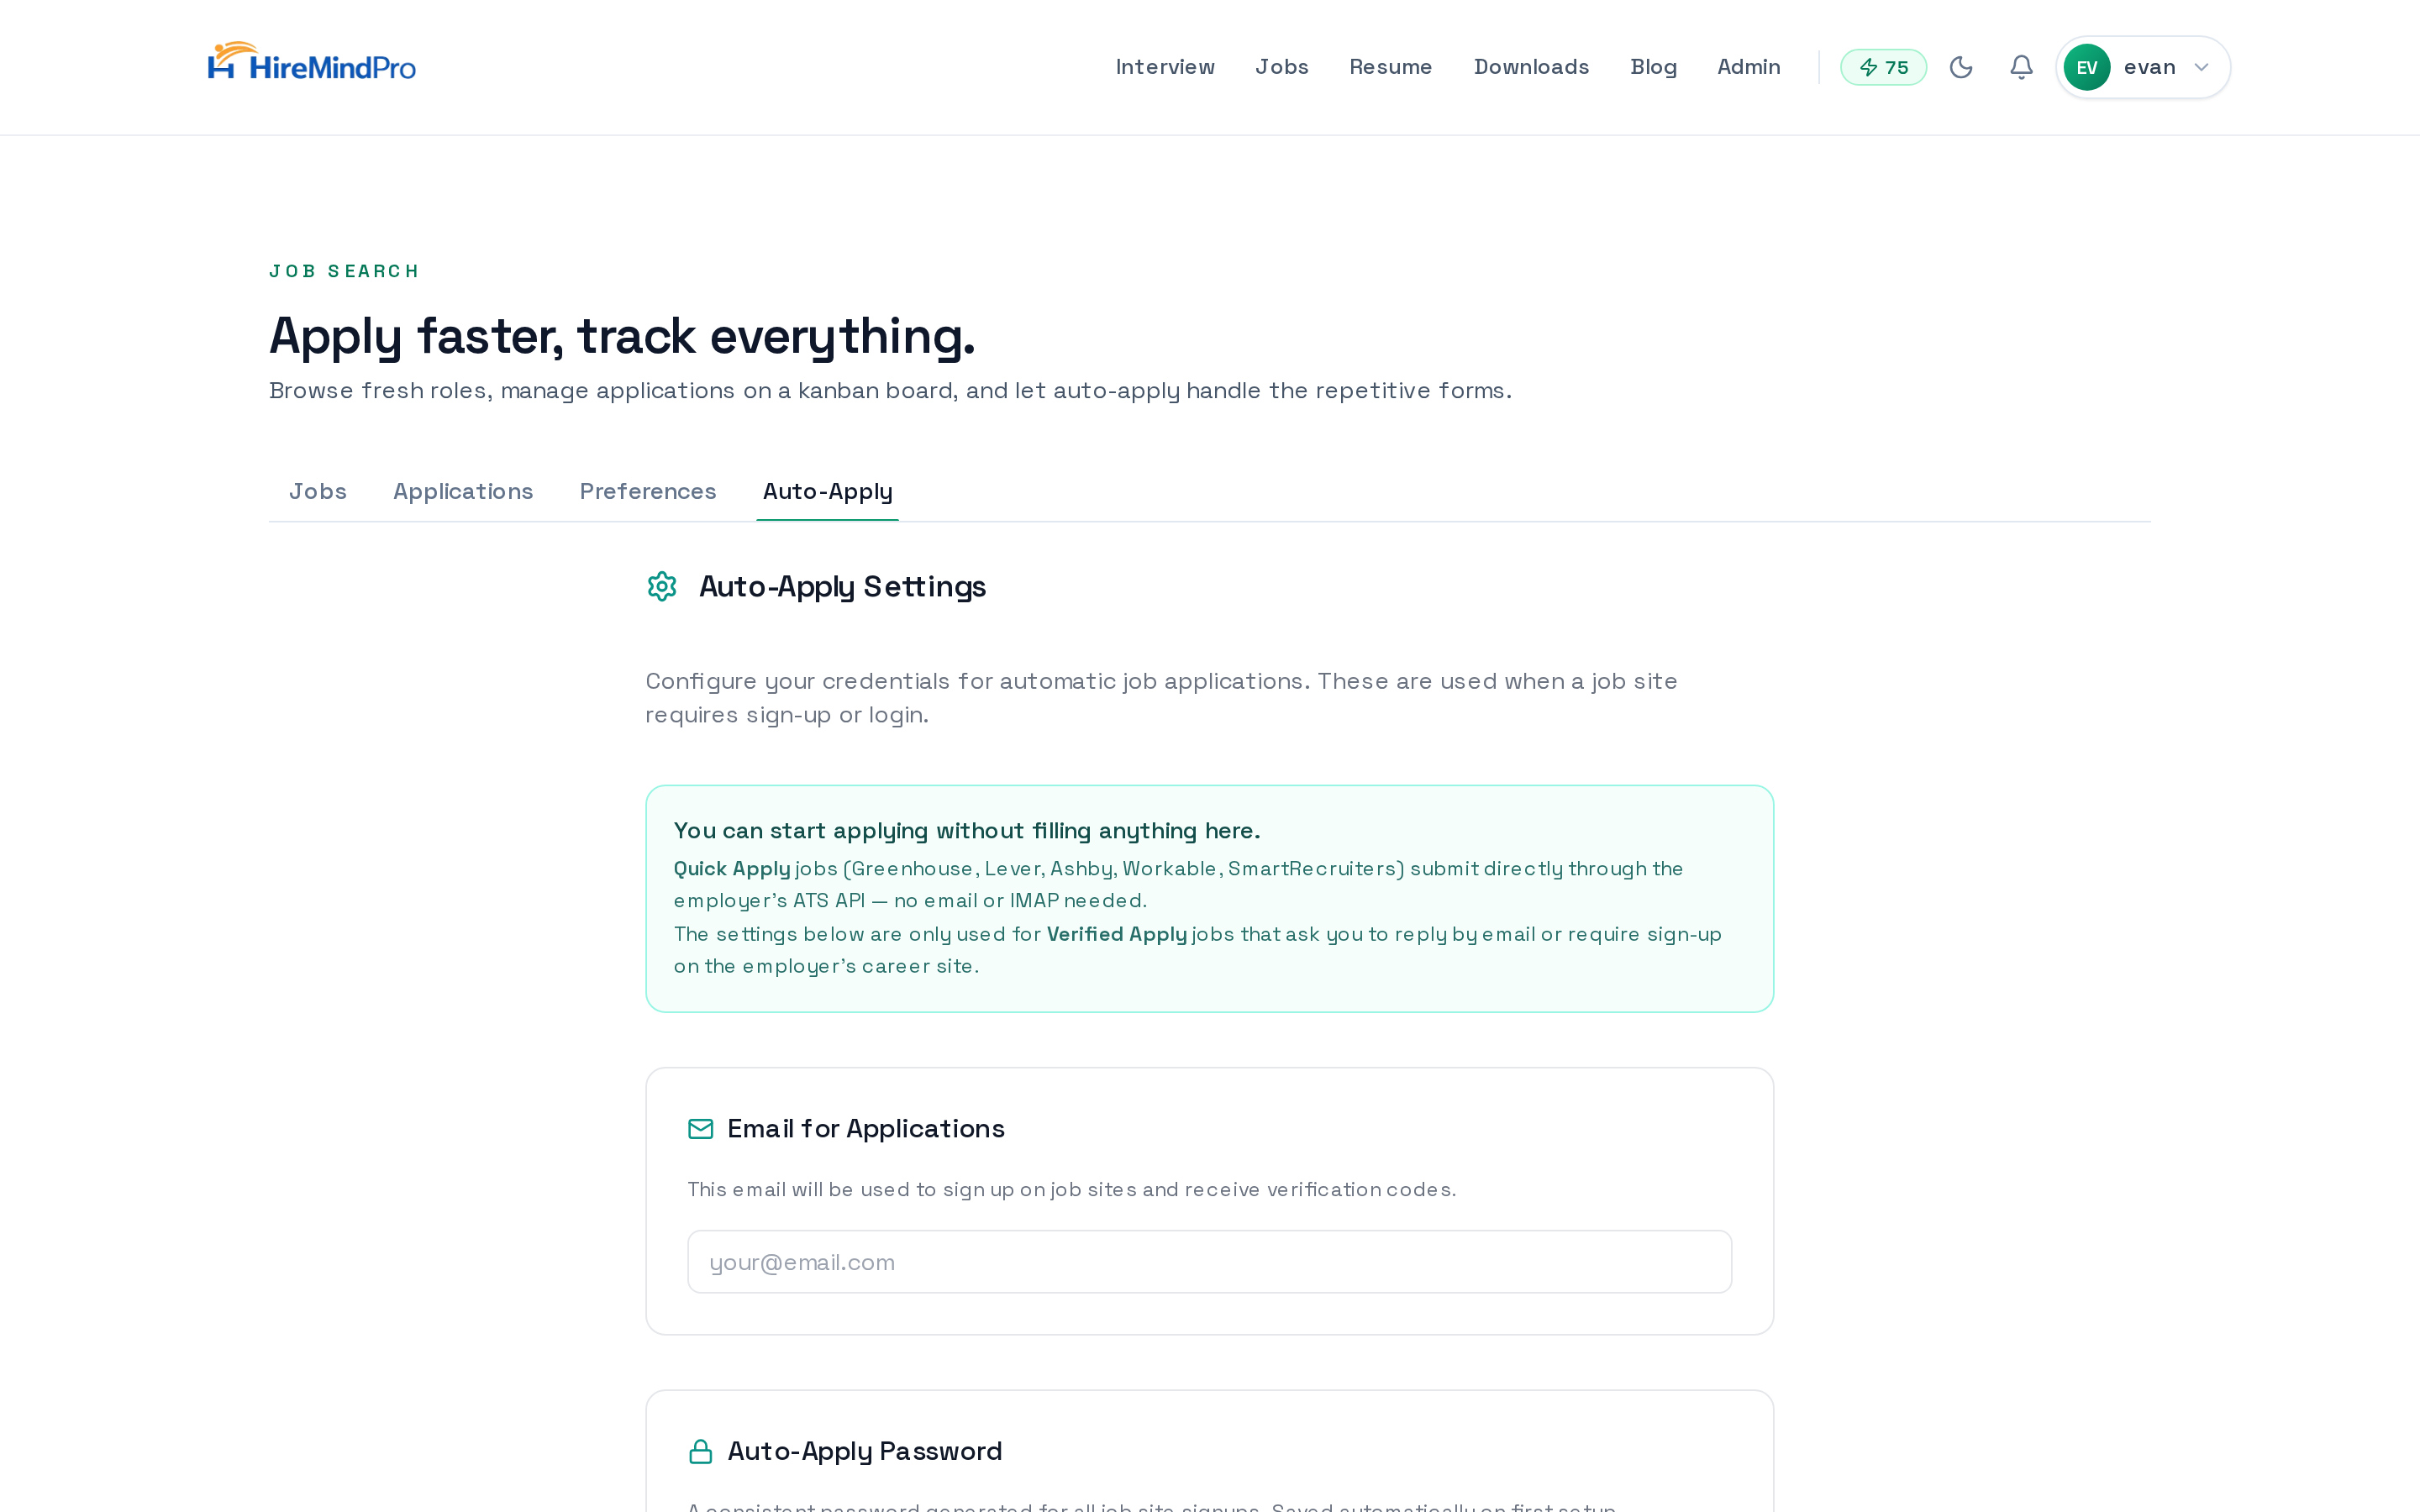
One-time Auto-Apply Settings (only for email/form jobs)
- Open the Auto-Apply tab on the Jobs page. A teal banner reminds you that Quick Apply jobs need nothing here — these settings only apply to Email Apply and sign-up/form jobs.
- Under "Email for Applications", enter the email used to sign up on job sites and receive verification codes.
- "Auto-Apply Password" is generated automatically the first time you save — you can show or copy it.
- Under "IMAP Email Verification" (Optional), enter IMAP Host, Port (993), email/username, and an App Password, then click "Test Connection". This lets the system read verification codes during sign-ups. Click the help (?) icon for Gmail/Outlook/Yahoo instructions.
- Under "Sending Email (SMTP)" (Optional), set a display name shown to recruiters. Leave "Use my IMAP credentials for sending (recommended)" checked to auto-derive SMTP from your IMAP host, or uncheck it to enter SMTP host/port/user/password manually.
- Click "Send Test Email" to verify SMTP, then click "Save Settings". A green "Settings saved successfully" confirms it.
Answer questions when an application needs input (NEEDS_INPUT)
- If an auto-apply hits a required question it can't answer from your profile, it pauses and the card on the Applications board shows "Answer questions to continue" / "Action needed — open to answer".
- You may also get an email with a magic link that drops you straight onto the Applications tab with the right card open.
- Click the card to open the detail modal. Fill in the required answers (optional ones can be left blank).
- Leave "Save this answer for future job applications" checked to reuse it automatically next time, or uncheck it if the answer is just for this job.
- Click "Resume Auto-Apply". The application continues from where it paused.
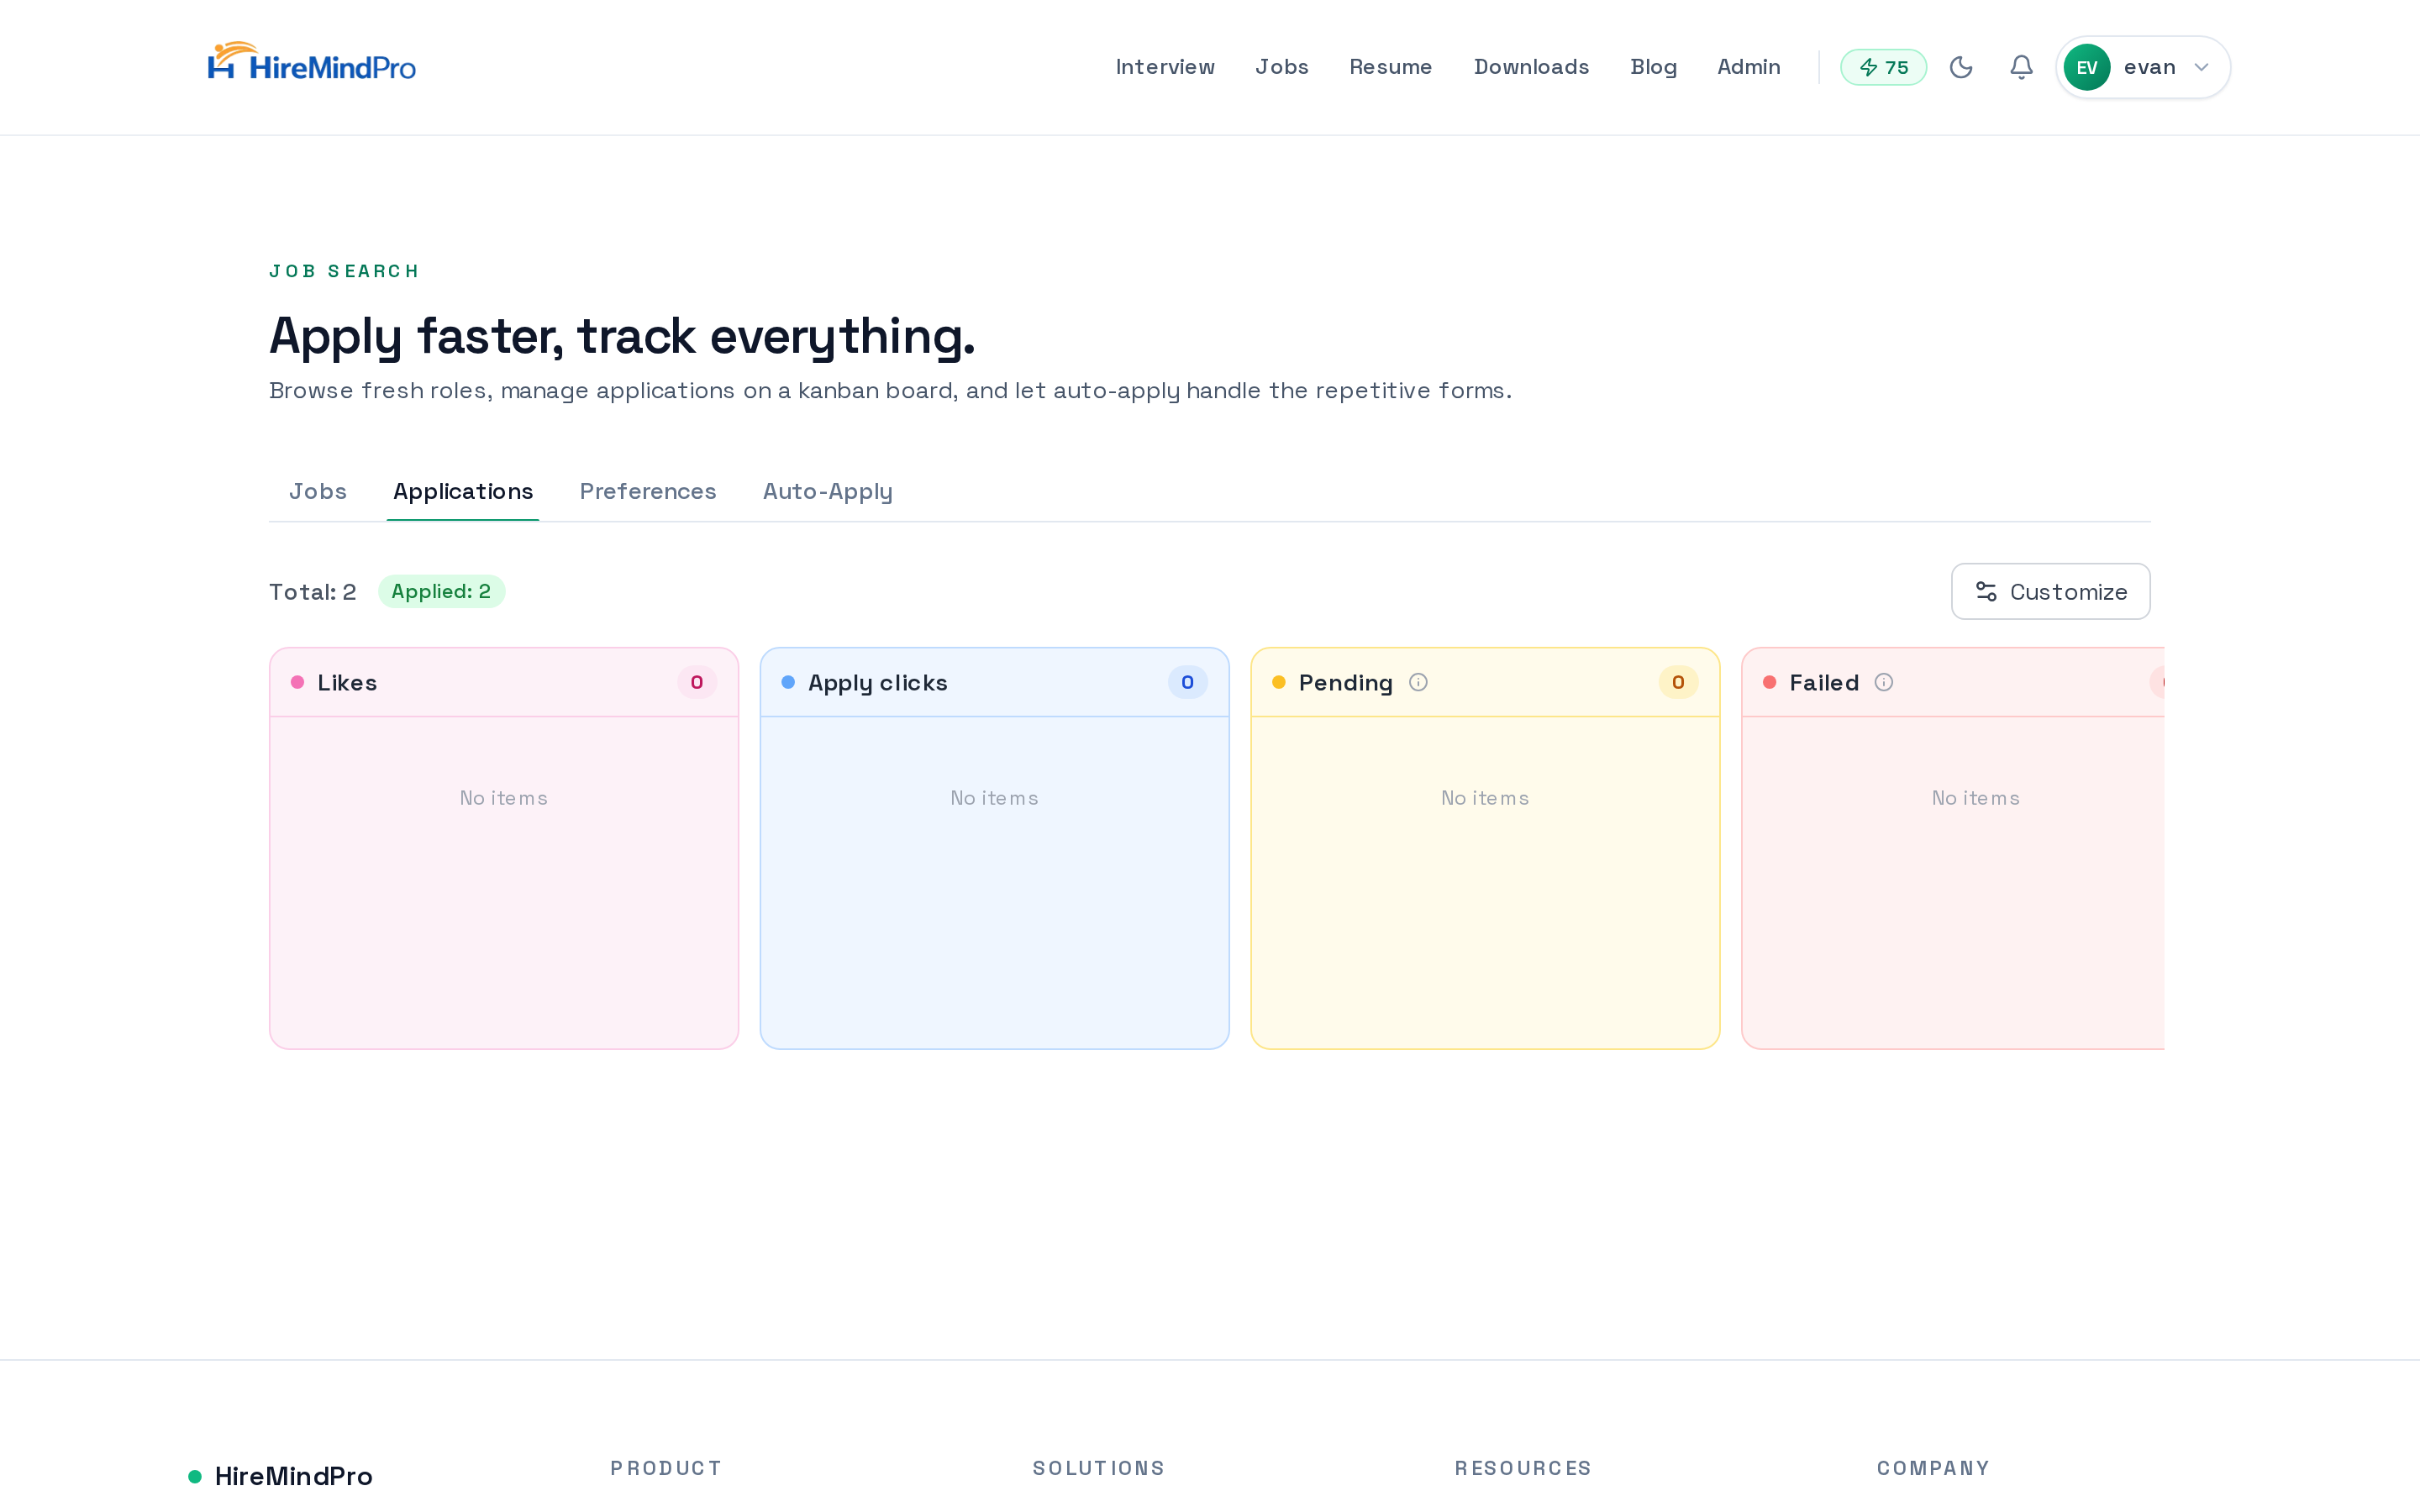
Track applications on the kanban board
- Open the Applications tab to see your board. Columns include Likes, Apply clicks, Pending, Failed, Applied, Interview, Offer, and Rejected.
- Drag a card between columns to update its status (for example, move an Applied card to Interview or Offer as things progress). Pending/in-flight cards stay in their automated columns.
- Click a card to view its progress steps, the tailored resume used, and (for email applies) the cover letter and recipient. Use the Download icon to grab the tailored resume.
- Click "Customize" to choose which optional columns are shown; Pending, Failed, and Applied are always present.
- For Failed cards, click the Retry icon to run the auto-apply again — it re-checks your credits and re-resolves the best apply method.
- Use the Delete (trash) icon to remove an application you no longer want to track (you'll be asked to confirm).
Tips & good to know
- Quick Apply (Greenhouse, Lever, Ashby, Workable, SmartRecruiters) is the fastest path and needs no email setup — start there to get value immediately.
- You're only charged 0.1 credits when an application actually goes through; failed attempts are free, so retrying a failed job is low-risk.
- Describe the role in a full sentence (e.g. "senior backend engineer at a startup paying $200k remote") to trigger AI search, which extracts filters automatically.
- Set your filters tight if you're a passive candidate — combine Region, Salary min, and Experience so you only apply to true matches.
- Keep "Save this answer for future job applications" on when answering NEEDS_INPUT questions to reduce future interruptions.
- Manual applies are free to track — after applying on the employer's site, confirm "Yes, I applied" so the role appears on your board.
- You can't auto-apply to the same job twice; the dialog and board both show it as Applied once submitted.
Ready to try it yourself?
Browse jobs →